
Purchasing an undeveloped plot of land is a uniquely exhilarating milestone. Unlike buying an existing home, where you must compromise on someone else’s structural choices, a raw piece of acreage represents a completely blank canvas. It offers you the rare opportunity to dictate every single detail of your future home, from the orientation of the morning sun in your kitchen to the exact layout of your backyard living spaces. Whether you have acquired a wooded mountain lot or a sweeping meadow, the dream of creating a custom estate from scratch is a powerful motivator.
Navigating this pre-construction phase successfully requires a strict, methodical approach. Jumping straight into building without a clear, engineered site plan is an incredibly risky strategy that can lead to structural shifting, flooding, and massive financial losses. To ensure your build moves forward smoothly, you must treat property preparation as a phased journey. This in-depth guide provides you with a practical, step-by-step framework for handling logistics, operating heavy earthmoving machinery, and safely establishing the vital groundwork to support your future home for decades.
Navigating the Vision and Planning Phases

Conduct Site Feasibility Studies and Draft Your Ideal Structural Layout
Long before the first piece of heavy machinery arrives at your property lines, the entire project must be meticulously organized on paper. The planning phase is where you reconcile your creative dreams with the physical realities of the terrain and local municipal regulations. Raw land is subject to a complex web of environmental protections, building setbacks, zoning laws, and utility easements that dictate exactly where you can and cannot build on your lot.
The design process must be a holistic collaboration that respects the natural features of your land. Collaborating with a skilled custom home architect allows you to design a property that works with the natural slope of the land rather than fighting against it. A professional designer will study soil conditions, analyze wind movement across the property, and position the future building envelope to maximize natural energy efficiency and panoramic views. This careful positioning ensures that your future living spaces will feel integrated with the surrounding environment.
Once your conceptual drawings are complete, you must verify that the layout can be realistically constructed within your budget. Consulting with local general contractors during the design phase helps identify potential building obstacles before you finalize your blueprint. An experienced builder can spot hidden red flags on a site plan, such as a rock ledge that will require expensive blasting, or a high water table that demands specialized foundation waterproofing systems. Reviewing these details early allows you to adjust your plans before investing heavily in permanent engineering documentation.
- Critical site planning steps to take before breaking ground:
- Order a comprehensive boundary survey to locate the exact property pins and lines.
- Complete a professional soil percolation test to design your private septic system.
- Review municipal setback rules to ensure your home sits far enough from public roads.
- Identify any protected wetlands, native habitats, or mature trees that cannot be disturbed.
Removing Surface Vegetation and Obstacles
Strip Away Intrusive Trees and Clear the Primary Construction Footprint
Once your permits are officially approved and your home’s footprint is locked in, the physical transformation of the property can finally begin. Most raw land is covered in a thick layer of natural vegetation, including mature trees, dense underbrush, tangled root networks, and large surface boulders. While leaving a portion of this forest intact provides invaluable privacy and natural character, the immediate zone surrounding the construction footprint must be stripped entirely clean to give crews a safe, open workspace.
Clearing a lot is heavy, invasive work that requires specialized machinery like commercial-grade mulchers, excavators, and industrial chainsaws. Hiring professional land clearing services is the first physical step to carving out an open workspace from an overgrown wooded lot. Operators will systematically cut back the thick undergrowth, extract deep root systems to prevent future soil settling, and drop trees that sit directly within the path of the future house, driveway, and utility trenches. Managing this green waste efficiently keeps your worksite organized and accessible for incoming supply trucks.
As the clearing work progresses, managing the non-biodegradable trash and random materials left behind by historical use becomes a priority. Older plots of land frequently feature hidden junk piles, abandoned farm fencing, or historical debris fields that must be completely removed from the building zone. Utilizing heavy-duty dumpster rental services on-site ensures that non-biodegradable debris, old fencing, and surface trash are hauled away cleanly. Keeping a large roll-off container on the property prevents your workspace from becoming a safety hazard, allowing construction crews to move freely without tripping over hidden metal wires or broken glass buried in the dirt.
Executing Major Earthmoving and Excavation Work
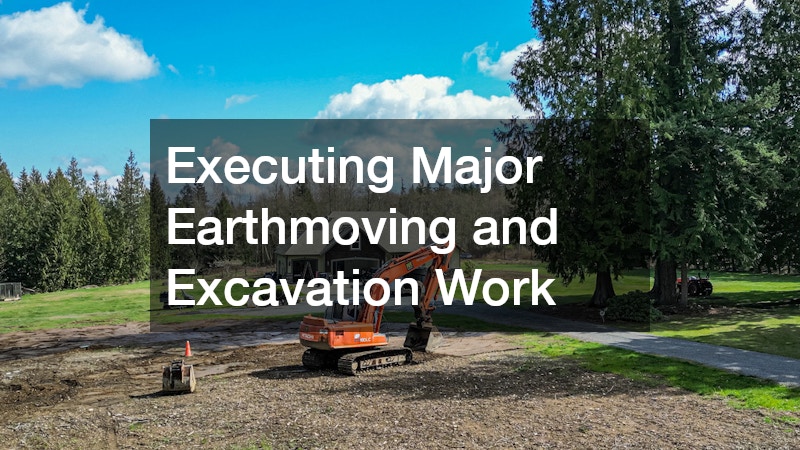
Dig the Foundation Footprint and Establish Safe Utility Trenches
With the surface vegetation completely removed and the site cleared of debris, the project transitions into the heavy excavation phase. This is the stage where the raw dirt is physically shaped to receive the home’s structural foundation. Precision is absolutely paramount during this process; digging too deep or miscalculating the angles of an excavation wall can cause the surrounding soil to cave in, ruining your layout and threatening the safety of the workers on the ground.
The primary goal of this phase is to carve out the subgrade cavity that will house your basement walls, crawlspace, or concrete slab foundation. A licensed excavating contractor will precisely dig out your foundation walls while preserving the integrity of the surrounding soil. The operator must work in strict alignment with your structural engineer’s blueprints, matching the exact depth and width measurements required to anchor the home firmly into the earth’s sub-strata.
Because raw land requires an entirely new infrastructure network, excavation work must also expand to include deep utility trenching. This involves digging safe channels through the dirt to carry main water lines, gas pipes, and subterranean communication conduits securely below the frost line. Comparing bids from different local excavating companies allows you to find a team that owns the specific size of bulldozers and backhoes your lot requires. Choosing a company with a robust fleet of modern equipment ensures that your utility trenches and foundation holes are dug quickly and cleanly, even if the machinery encounters dense clay or stubborn subterranean shale.
- Key targets for a professional excavation inspection:
- Verifying that the subgrade dirt matches the exact depth specifications on the blueprints.
- Ensuring the excavation walls are sloped or shored properly to prevent collapse.
- Confirming that utility trenches are dug deep enough to sit safely below your local frost line.
- Checking that the bottom of the foundation trench is clear of loose, uncompacted dirt.
Grading the Lot for Long-Term Water Drainage
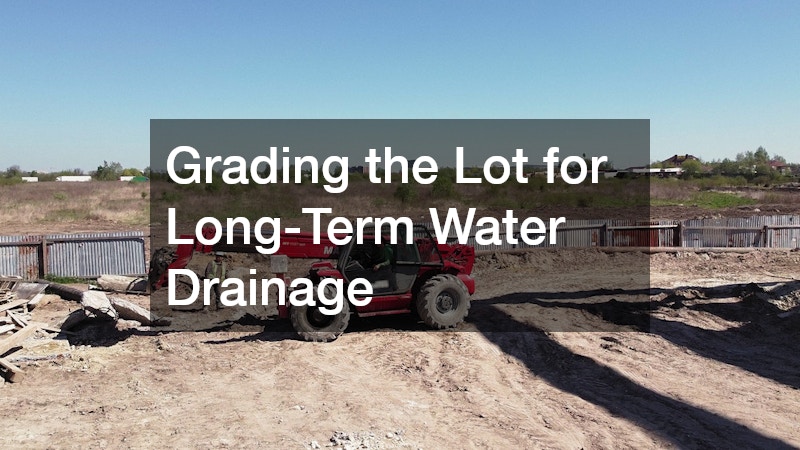
Establish the Final Subsurface Slopes to Protect Your Foundation
The long-term safety and durability of your custom home depend heavily on how effectively water is managed around its perimeter. Water is an incredibly destructive force; if a home site is poorly leveled, heavy rainstorms will cause water to pool directly against your foundation walls. This pooled water creates hydrostatic pressure that eventually forces its way through solid concrete, flooding basements, ruining interior finishes, and destabilizing the supporting soil below your home.
Preventing these water issues requires a thorough, calculated shaping of the entire lot’s topography. Working with an experienced grading contractor guarantees that stormwater will flow safely away from your home’s perimeter. The operator will establish a positive slope that drops at least six inches over the first ten feet surrounding the house, creating a natural path that channels rain into swales, retention ponds, or public drainage ditches before it can threaten your structure.
This leveling process requires continuous soil compaction to ensure the earth remains stable under the massive weight of a residential building. If dirt is simply pushed into a low spot without being compacted methodically in thin layers, it will settle unevenly over the coming years, causing concrete patios to crack and foundations to shift. Top-tier excavating contractors utilize advanced GPS laser leveling equipment to confirm that the ground meets your structural engineer’s exact drainage profile. This high-tech precision ensures that the entire lot is sculpted correctly, giving you complete peace of mind during heavy seasonal downpours.
Bringing Essential Utilities to the Site
Establish the Power Grid and Secure the Weatherproof Shell
With the ground leveled, the foundation dug, and the main earthmoving projects complete, the property is finally ready to transition from a raw excavation site into an active construction zone. To support the upcoming framing and mechanical installation phases, you must establish a reliable source of power and secure the exterior shell of the building as quickly as possible. This requires careful coordination between your utility providers and specialized trade professionals.
The first electrical step involves bringing grid power from the nearest main utility pole down to a temporary service panel on your lot. Bringing in certified electricians to hook up temporary power lines ensures your building crew can run heavy-duty tools safely. These specialists will set up a weatherproof outdoor breaker box that can handle the heavy electrical demands of air compressors, table saws, and heavy charging stations, eliminating the need to rely on noisy, inefficient gas generators that slow down production.
As the structural framing moves upward, the focus shifts toward protecting the exposed interior elements from weather damage. Framing lumber, subflooring, and internal mechanical wires must be shielded from moisture to prevent wood warping and mold growth. Coordinating your build timeline so that roofing contractors seal the dry-in layer quickly prevents sudden rainstorms from ruining the exposed subfloors. Once the roof is fully shingle-ready and the underlayment is locked down, your interior trades can begin installing detailed wiring, plumbing pipes, and climate control fixtures in a completely dry, protected environment.
- Essential steps for securing your utilities and weather shell:
- Coordinate with the local power company to install a temporary utility pole near the home.
- Install temporary ground fault circuit interrupter outlets to maximize safety on the worksite.
- Lay down heavy-duty house wrap across the exterior framing to stop wind and moisture transfer.
- Install the primary roof underlayment and flashing kits around chimneys and valleys immediately after framing.
Managing Post-Excavation Site Logistics

Establish Clean Access Paths and Organize Material Staging Zones
As the heavy dirt work concludes and the structural building phase accelerates, the overall flow of traffic on your property will change dramatically. A site that was once occupied by a single bulldozer will now see a constant stream of delivery trucks, concrete mixers, flatbeds carrying lumber piles, and vehicles driven by various subcontractors. Without a clear logistical plan to manage this influx of traffic, your property can quickly transform into a chaotic, muddy mess that causes material damage and project delays.
Managing this phase successfully requires setting up clear, stable access paths and dedicated staging zones right away. You need to lay down a thick layer of crushed gravel or reclaimed asphalt along your future driveway route to support the extreme weight of incoming delivery vehicles. If heavy trucks drive directly over soft, uncompacted topsoil during the spring rainy season, they will quickly dig deep ruts, get stuck in the mud, and tear up the precise grading work that your crew spent days leveling. A stable gravel path provides reliable traction, keeps mud off public roads, and protects your property’s soil structure.
Furthermore, dedicate specific, flat zones on the property for material staging and storage. Work with your building crew to position lumber piles, framing trusses, and roofing bundles on elevated skids away from low-lying areas where water might pool during a storm. Keep these storage areas close enough to the main building envelope to minimize the distance workers have to carry heavy materials, yet far enough away that they do not block access to utility trenches or foundation walls. Staying organized protects your expensive building materials from moisture damage and ensures that each trade professional can work with maximum efficiency.
Conclusion
Methodically clearing surface vegetation and removing historical debris establishes a clean, open workspace that allows incoming crews to perform their jobs safely. Following through with precision excavation work, stable utility trenching, and laser-guided grading guarantees that your home will rest on a firm, dry foundation completely protected from water erosion. Managing the sequencing of your mechanical grids and weather shells keeps the project moving forward efficiently. Take a proactive look at your raw acreage today, visualize the engineering steps required to stabilize the soil, and assemble a trusted team of professionals to transform your wild plot of land into a beautiful, secure homestead that will stand strong for generations.


